If you have a problem with mould in your home, Cleaning Express can help. Today, we’re providing our cleaning customers with information about mould and how to get rid of it. First, though, we need to look at types of damp. You see, mould is caused by different types of damp. In order to get rid of mould, you need to know which type of damp you have in your home.
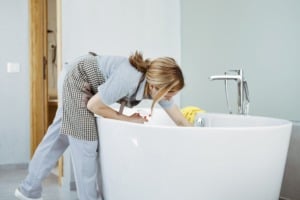
mould cleaning

Different types of damp

Firstly, what is mould? Mould is a type of fungus. It grows on damp surfaces. This means that the mould in your home is present in nature too. It is formed when there is warm, moist air conditions because this is the ideal environment for mould. The types of conditions present when a property has damp, for example. Mould also loves to feed on dust, wood and carpets, so our homes make an ideal breeding ground for it.

Several types of damp can cause mould in your home. We can provide some get cleaning tips to get rid of the mould, but you do also need to solve the issue that is causing the damp. If you don’t, the mould will return. The types of damp that can cause mould in your home include:

Rising damp – this occurs when the damp proof course in your property is failing or is missing. This can mean that damp rises up through the wall of your home. Generally, the mould from rising damp will only be about a metre high on the ground level. That’s a good indication that you have rising damp.

Penetrating damp – this occurs when there are cracks in the mortar or brickwork on the outside wall of your home. The mould is likely to get worse after a storm because the wind pushes the rain on to the wall and forces it into the cracks.

Condensation – poor ventilation is the biggest cause of condensation. When moisture cannot escape, it lands on the nearest, coolest surface. This is typically why condensation is found in bathroom and kitchens where there is a lot of moisture and often poor ventilation.

There are DIY solutions to all of the types of damp that we mentioned above, and you can also find professionals to sort out your damp issues too. But how do you get rid of the mould that is caused by the damp?

Getting rid of mould in the home
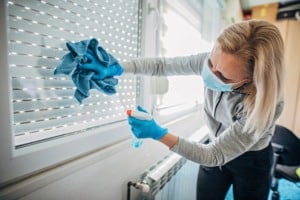
how to get rid of mould

There are ready-made chemical-based treatments for damp and mould that are widely available. However, you can also make your own.

How to get rid of dampness on walls

For mould on walls, a bleach solution is best. Just mix one-part of bleach to four parts of water. Spray it on the mould and scrub it with a brush. Clean the area with a damp cloth and make sure to dry the area fully.

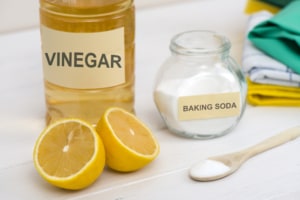
If you don’t fancy using bleach or any of the commercial chemical-based mould cleaners available, you can use natural cleaning products too. White vinegar works great on mould. You can simply spray the vinegar on the mould, leave for an hour and give it a scrub. Or you can use bicarbonate of soda. Just dissolve a teaspoon of bicarbonate of soda in a bottle of water, spray on the area and give it a scrub.

Whichever method you use to get rid of the mould in your home, do make sure the area is completely dry after you have finished. And make sure you wear gloves, eye protection and a mask that protects you from the mould. Mould can seriously affect your health. You also should make sure that the damp causing the mould is sorted out. Otherwise, the mould will return. If you would like to learn how to kill mould, please read our related article.

More cleaning tips

For Cleaning Express‘ help with your mould issues, please explore our website further. Our deep cleaning services are perfect for sorting out mould and getting a house ready to be a family home. Speak with one of the Cleaning Express staff today for more information and a free quote for all of our cleaning services or send us a message via website or Facebook.

office cleaning

If you’ve been considering hiring a professional cleaning company to clean your office, you may have some questions. After all, there are other options for keeping your office clean. Firstly, you could clean your office, but that adds more to an already busy day. You could also hire a local, solo cleaner to clean your office, but that can lead to further headaches. In this article, Cleaning Express will show you why using professional cleaners to clean your office is the best choice for you, your staff, and your business.

Trustworthy and reliable cleaning services

To create a clean environment that allows your employees to focus on their work, you need a cleaner that will show up on time every time. Using Cleaning Express ensures this will happen. Most of our cleaners are local to the area that they clean, and they are fully insured and vetted. We also fully train all of our cleaners in all of the cleaning tasks they may be required to do. Plus, if any of our cleaners are ill or on holiday, Cleaning Express can provide another cleaner as a replacement to ensure that your office still gets cleaned, without you needing to do anything.

Stress-free

If you own a business, you already have plenty of stress and work to keep you busy. So you don’t want a cleaner to add further stress. As we said above, Cleaning Express takes care of everything for you. We provide a highly skilled cleaner for regular office cleaning services and a replacement whenever you need one, but there’s more too. Cleaning Express provides office deep cleaning services and antiviral disinfection cleaning services for offices too. So, no matter what cleaning service your office may need, even carpet cleaning services, Cleaning Express is here to help and take all of the stress out of cleaning your office. This allows you and your staff to focus on your business in a fresh and clean environment.

professional office cleaningNo hidden costs

Finally, the best part of using Cleaning Express to clean your office is there are no hidden costs at all. We provide quotes for all of our cleaning services, from our regular cleaning services to our deep cleaning services and everything in between. So when you use Cleaning Express to clean your office, you will never be stuck with a higher bill than you thought.

Cleaning Express is the perfect professional cleaning company to clean your office in London. We are an independent, family business that uses local cleaners who are highly trained and fully vetted by us. For more cleaning information, please explore the Cleaning Express website further.  Learn more about our other cleaning services that we provide. We hope this article was helpful to find out why you should use professionals to clean your office. To book please give Cleaning Express a call or send us a message via website or Facebook.
Read also:

We’ve all seen the flu and Covid adverts that show just how easily bacteria spreads on buses, trains and in other public spaces. Well, the same is true with bacteria in your home. If a member of your household has been ill recently, whether with the flu or Covid, bacteria could be all over your home. So, you need to know how to clean your home when someone is ill. By cleaning your home, you can get rid of the bacteria and minimise the risk of anyone else in the home getting sick. Here’s some simple cleaning tips to help you clean when someone at home is ill. Antiviral disinfection

What should you clean after someone is ill?

Giving your home a good clean is really important, of course, as bacteria can survive on all surfaces. However, bacteria can survive for a lot longer on harder surfaces than softer ones. Here are a few areas of the home to focus on:

The TV remote – if your family member has spent a lot of their time watching TV while they are ill, there could be many bacteria on the remote. So, make sure to disinfect the remote regularly while they are ill.

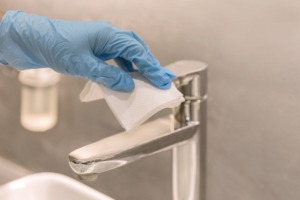
The bathroom – did you know that nearly half the taps in the UK have flu bacteria on them? This is because bacteria can survive on metal for many days. So, ensure that you disinfect your taps as well as the sink, toilet, shower, bath and the floor too.

Tables and countertops – just like any horizontal surface in your home can become cluttered, they are also very likely to collect bacteria too. So, pay attention to your kitchen counters, tables and any other horizontal surfaces in your home.

Linen – make sure that you regularly wash your bed linen, particularly if you are sharing a bed with someone with the flu or Covid. Stuffed animals, towels and any type of blanket or throw should also be washed as regularly as possible. If you notice any ‘fluids’ on mattresses or sofas, give that area a good cleaning too!

If you make sure that your whole family washes their hands regularly, and you maintain your regular cleaning regime using disinfectant wipes and sprays on surfaces and washing your linens and clothes on hotter cycles, you can rid your home of cold, flu and Covid bacteria. However, there is a better way!

Deep cleaning London

Use a professional cleaning service

Cleaning Express does offer deep cleaning and antiviral disinfection cleaning services too. These cleaning services are perfect for when someone in your home is ill. Our expert team of cleaners can get rid of all of the bacteria in your home in just a few hours. If someone in your household has had Covid or the flu recently and you need an antiviral disinfection cleaning service, give Cleaning Express a call or send us a message via website or Facebook.

These cleaning tips will help minimise the risk of your family coming into contact with bacteria after someone at home is ill. For more cleaning tips, please explore the Cleaning Express website further. And learn more about our other cleaning services that we provide.

Getting a streak-free shine on your windows seems near impossible to many of us. Professional window cleaners make it look easy, but if you have ever cleaned your windows yourself, you’ll know that it is anything but easy. Today, we’re looking at cleaning windows and how you can achieve a streak-free shine pretty easily with simple cleaning equipment.

How to clean windows

How to clean your windows

With the right window cleaning spray, cloth and techniques, cleaning your windows is fairly straightforward. But what are the tips on cleaning your windows? Well, here they are! The first window cleaning tip may sound a bit odd, but it is actually one of the best on this list.

Choose the right day

If you try to clean your windows on a hot day, the cleaning solution will dry out too quickly and leave streaks. So, try to clean your windows on a cloudy but dry day. That way, the solution won’t dry out too quickly so you can wipe it off nice and evenly. If its summer, you can start on the shady side of the house, which should help matters.

Give your windows a dusting first

We know that dusting your windows may make you look a bit odd to your neighbours, but it can really help when trying to achieve a nice finish. Dusting your windows first allows the window cleaner to do its job a lot easier. You can dust your windows by using your vacuum cleaner or with a microfibre cloth. Just make sure to use a fresh cloth for the cleaning stage.

tips on cleaning your windows

Window cleaning solutions

Most commercial window cleaning sprays do work really well as long as you use enough of it. Don’t shy away from using loads of window cleaning solution on each window as this helps it cut through the grime and will improve your finish.

Use a microfibre cloth

We’re sure you’ve seen some people use newspaper for drying off their windows, but microfibre cloths work perfectly well. Keep wiping your window until it is dry, once it is, it will be streak-free and awesome!

 No need to squeegee

If you’re cleaning your windows in your home, using a squeegee will leave cleaning solution all over your floor or window sill. So, skip this step. As long as you have dried your windows well enough with the microfibre cloth, you don’t need to squeegee anyway, they will be nice and clean. This step can also be skipped when cleaning the outside of your windows too.

More cleaning tips

Don’t forget, if you use Cleaning Express’ cleaning services, we do offer window cleaning services. Just let your regular cleaner know, or let the end of tenancy or deep clean team know, and they will clean the interior of your windows. We hope these tips on cleaning windows have given you everything you need to get a streak-free shine on your windows.

For more cleaning tips, please explore the Cleaning Express website further, you can also read our article about what is domestic cleaning to learn more about home cleaning. For professional cleaning services in London for domestic cleaning and commercial cleaning, give Cleaning Express a call for a quote for any of our high-quality cleaning services or send us a message via website or Facebook.

How to clean your washing machine

You may think that your washing machine cleans itself with each wash you put in it. However, each time you put washing in your machine, you are pushing dirt and grime through the system as well as fresh water. And if you’re similar to me, loads of mud from dog walks too! So, even though your washing machine is pumping clean water through itself each time you use it, once it mixes with your washing, it is no longer clean. So, how can you clean a washing machine? Well, we’re glad you asked. Cleaning a washing machine isn’t difficult and below we’re going to tell you exactly how to do it!

How to clean your washing machine

If you use your washing machine a lot, you should consider cleaning it once a month. If you don’t do too many loads of washing, you can get away with cleaning it every three to six months. However, the more you clean your washing machine, the better it will perform. Cleaning inside your washing machine is as simple as running two cycles:

Bicarbonate of soda – cycle one

With an empty washing machine, add a couple of cups of bicarbonate of soda into the drum of your washing machine. This will scrub the inside and take care of pesky smells left behind by clothes and cleaning products. Use a long, hot water cycle to aid the bicarbonate of soda. Your washing machine may have a self-clean function, you can use that if it does.

Vinegar – cycle two

Once the first cycle has finished, add a couple of cups of vinegar to the machine. You can use essential oils with the vinegar too. These not only help with the smell of the vinegar but can also take care of mineral deposits in the machine too. Run the same cycle as you did above.

A bit of elbow grease

After you have run both washing cycles, you can come in with a microfibre cloth and give the drum a wipe down to ensure it is lovely and clean. Make sure you pay attention to the rubber seal of the washing machine during this step as nasty stuff loves to hang around here.

Cleaning the dispenser tray

Most washing machines have removable dispenser trays. If yours does take it out and soak the tray in vinegar and bicarbonate of soda. You can do this while the washing machine is running those cycles. This means can you wipe the trays clean easily. If your washing machine doesn’t have removable trays, you can add a vinegar and bicarbonate of soda solution to the drawer. Let it soak in then use a toothbrush and a microfibre cloth to give it a good scrub.

That’s all you need to know about cleaning your washing machine. Cleaning a washing machine is nice and simple and doesn’t require too much elbow grease at all. For more information about cleaning such as “what is domestic cleaning” and our cleaning services explore the Cleaning Express website further. For professional cleaning services, give Cleaning Express a call today or send us a message via website or Facebook.


Useful tip:

How to clean silver at home

How to clean limescale from toilet bowl

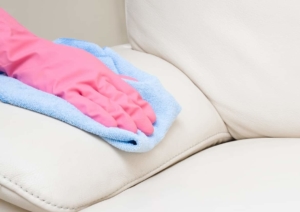
Knowing how to clean a leather sofa will help it look stylish and beautiful for many years. For this, all you need to do is wipe your sofa down with a dry cloth or vacuum it every week or two weeks. This regular cleaning routine will take care of the leather and ensure that no dust stays in the creases long enough to do any damage.

This basic method of cleaning leather is brilliant for maintaining your leather sofa, but it will still require a deep clean every three to six months. Here is a step-by-step guide on how to deep clean your leather sofa, don’t worry, it isn’t difficult.

How to clean leather sofa

A step-by-step guide on how to clean a leather sofa

What you’ll need:

  • A vacuum cleaner
  • A couple of microfibre cloths
  • Saddle soap (some people do use homemade leather cleaners, but these can be tough on delicate leathers. If you plan on using vinegar or bicarbonate of soda, for example, do check an inconspicuous area first).
  • Leather cream

Step 1: Vacuum the leather sofa

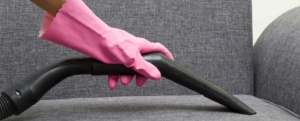
To start the deep cleaning of your leather couch, you’ll need to remove any dirt pet hair and dust from the surface of your sofa. Your usual cleaning method (either vacuuming or using a dry cloth) will be fine for this step. This stops the dirt from being moved around when you’re wiping down the surface of the sofa with a cleaning solution, which is the next step.

Bonus tip: if you have a soft brush attachment for your vacuum cleaner, use it here. Your vacuum cleaner may scratch your leather, which is, of course, the reverse of what we want. If you don’t have a soft brush attachment for your vacuum cleaner, or you’d prefer not to use it, a dry microfibre cloth is an ideal substitute.

Leather sofa cleaning

Step 2: Test the Saddle Soap or Natural Cleaner

As we said above, we prefer using saddle soap (or a dedicated leather sofa cleaner) to clean leather sofas as they are designed for the job. However, you can use a natural cleaner if you wish.

In either case, though, now is the time to test the cleaner on an area of the sofa that you won’t see. Just apply a small amount of the leather cleaner you intend to use on an area that isn’t highly visible.

Let it dry and ensure that the results are what you want. Look for any darkening or discolouration. If there is any, you’ll want to change the leather cleaner you are using. It can help to look at reviews of commercial leather cleaners or search for the perfect natural leather cleaning solution to use. Still, do test them before committing to using them on your whole sofa.

See also: How to clean leather

Step 3: Clean the sofa with a leather cleaner and microfiber cloth

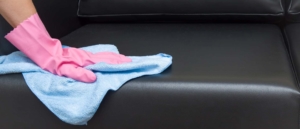
You’ll need two clean microfibre cloths for this step. One of these cloths will be used for cleaning the sofa with your choice of leather cleaner. The other one will be for drying the sofa, so put that to one side for now.

Apply some leather cleaner to the cloth. The cloth shouldn’t be soaking wet, just damp. Then work from the top of the sofa down, making sure you get into all of the creases and corners.

Ensure to reapply the leather cleaner as you go, while making sure that the cloth is never heavily soaked in the solution. You can also rinse the cloth with warm water and wring it out if you notice any heavy dirt build-up.

Once you’re done, use the other microfibre cloth to completely dry out the entire sofa as best as you can. You can begin to gently buff the sofa as you go to start the polishing process. You don’t need to rinse the solution out of the leather, as you haven’t used it too much.

Just ensure that the leather is nice and dry after this step. If you notice that the microfibre cloth is becoming very damp, you may need another cloth to finish this process.

Step 4: Apply a Leather Conditioner

Now that your leather couch is clean and buffed out nicely, you need to apply a leather conditioner. If you don’t, your leather can crack and become brittle.

Following the instruction of your chosen leather conditioner will ensure that it restores suppleness and moisture to the leather.

This step is very important for maintaining a leather sofa and ensuring it looks wonderful for years. Your leather sofa should be conditioned at least once a year, but it should always be done after a deep clean.

Removing stains from the sofa

Bonus Tip: What about spills?

Of course, many leather sofa owners are cleaning their sofa regularly already and perhaps are looking for cleaning tips to aide them when the worst happens. If you spill anything on a leather sofa, it can spell disaster if you don’t know how to tackle the spill.

To ensure that a stain doesn’t ruin your leather couch, it is best to act quickly. Blot up the stain as soon as you can. This goes for water, oil, ink, wine or food. You need to do this before the stain has time to set.

Rubbing alcohol can be used to carefully lift ink stains, and bicarbonate of soda (baking soda) works well on grease. Once you have lifted the stain, you can then repeat the deep cleaning method above to ensure that your leather couch still looks brand new.

Upholstery cleaning service

We hope this look at cleaning a leather sofa has been helpful. As we said, cleaning a leather sofa and keeping it looking new isn’t difficult. It requires a touch of elbow grease, but your sofa will look great for many years to come. You also want to consider cleaning your bed the same way to improve sleep quality.

To find out more about our domestic cleaning services such as upholstery cleaning from Cleaning Express, give us a call or send us a message via website or facebook. One of our excellent cleaning team can be with you as soon as tomorrow. More cleaning tips:

FAQ

Can I use dish soap to clean a leather couch?

Dish soap can be used to clean a leather couch, just mix some mild dish soap with warm water and start wiping the couch with a microfiber clothed soaked in the dish soap solution.

Can I use vinegar to clean a leather sofa?

Yes, make a solution of 1 part white vinegar, and 1 part water and dampen a cloth with the solution and start blotting or wiping and let it dry. Be sure to test this on a small area of your sofa first.

What is safe to clean a leather couch with?

To figure out what is safe to clean your leather couch with, you must look at the leather furniture label first before you decide to clean your sofa without damaging it.

Cleaning leather is actually relatively simple. Still, many homeowners with leather sofas, bags, car seats, etc. get a bit confused as to what the best methods are for cleaning leather. Leather is a very durable fabric, and if you stay on top of cleaning and protecting leather, it will last many years. So, here is, not only how to clean leather, but also protect it too.

How to protect leather


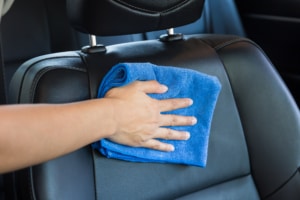
How to clean leather car seat

What leathers do you have in your home?

The type of leather that you have in your home dictates which leather cleaning methods you should use:

Treated leather has a protective coating on it, this is likely to be what a leather sofa or car seats are made from.
Untreated leather and suede doesn’t have this protective coating on it and could be what your leather bag or wallet is made from.

If you have treated leather in your home, saddle soap can be used to clean, freshen up and protect it. However, even the mildest soaps can be harsh on untreated leather. If you aren’t sure whether your leather has a protective coating on it or not, test an unseen area with the cleaning agent you intend to use.

Use a good-quality commercial leather cleaning product

We love natural cleaners and have pages and pages on here showing you how to use natural cleaners for all types of cleaning tasks. However, when it comes to leather, these natural cleaners are not ideal. Lemon juice, bicarbonate of soda and vinegar can all be very harsh on leather. So, instead of natural cleaners, it is best to buy a good-quality leather cleaning product. This could be a leather cleaning product designed for car seats, for example. Or a leather cleaning product that is designed for delicate leathers like handbags and wallets. It is a good idea to have leather cleaning products that can tackle both protected leather and delicate leather (this typically means buying more than one leather cleaner) as you can always clean your leather whenever it is needed, which brings us nicely to our next point.

How to clean leather

Stains on leather

If you spill liquid on any kind of leather, the easiest way to get it out is to act quickly. Start by blotting the leather with a soft cloth and remove as much of the moisture as possible. Then, use warm water to dab the area to remove any more of the liquid. Then use a leather cleaner on another cloth. Don’t spray the cleaner on the leather, spray it on the cloth. Keep dabbing the area until it is clean. Then dab the area again with a dry cloth to ensure it is clean and dry. Don’t rub the leather, as this can leave watermarks.

It is a great idea to keep some ink stain remover on hand for stains on leather. There are ink stain removers specially designed for leather. However, some people use rubbing alcohol on protected leather. This shouldn’t be used on unfinished leather, though. For grease stains, you can use talcum powder with some good results. However, if you get grease on unprotected leather, it typically soaks in and is almost impossible to remove.


See also: How to clean leather sofa


General cleaning

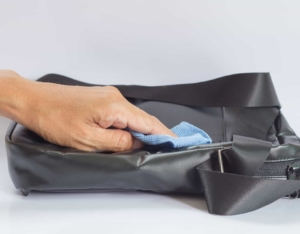
How to clean leather bag

When you are giving your leather a bit of a spruce up, it is always best to vacuum it first. This removes any dirt and dust. The little brush attachment for your vacuum will work great for this. Then, wipe the leather down with the leather cleaning product you have chosen. The cloth you use shouldn’t be soaking wet, but just damp. Focus on the areas where the dust and dirt like to settle and any areas that really need your attention. Do not rub too hard, this could damage the leather. If you are cleaning a leather bag, for example, it is best to dab rather than rub as rubbing even softly can damage very delicate leather. Keep repeating this and washing your cloth until the leather is clean.

For cleaning leather shoes, a shoe brush will be needed as this helps to remove any dirt that has really got into the pores of the leather. For most other leather items, though, a good-quality microfibre cloth is all you need to get a great result. That includes leather jackets, sofas, car seats and handbags.

Dry your leather

After cleaning your leather, it is vital that you dry it out as best as you can. Moisture damages leather very easily. So, grab a clean cloth and dab the areas that you have cleaned. Open a few windows and let your leather dry out for a few hours.

Protecting your leather

Now that your leather is completely dry, you have to protect it. If you don’t protect your leather, it can become brittle and can damage easily, this is when cracks in leather are most prone. A good leather conditioning product isn’t too expensive, and it will make your leather feel supple and look great. It is best to use a wax-based leather conditioning product, and there are different leather conditioners available for delicate leathers and tougher ones too. Choose the right leather conditioners and apply it using a cloth. This should be done in circular motions. Take your time and ensure that you get this conditioner into all of the creases of your leather item. Leave this to dry once again, and your leather will look beautiful once again. Leather conditioning should be done at least once a year. However, if you do spill anything on your leather sofa, car seat or handbag, for example, once you have cleaned it and given it time to dry, you should condition the area again to protect it.

That is everything you need to know about leather cleaning. As long as you stay on top of your leather and condition it regularly, it will look beautiful for years. For more cleaning tips, please explore the Cleaning Express blog further. To find our more about our cleaning services from Cleaning Express, give us a call or send us a message via website or facebook. One of our excellent cleaning team can be with you as soon as tomorrow.

How to clean leather shoes


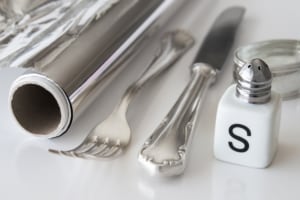
Our cleaning customers often ask us whether we have any cleaning tips for how to clean silver at home. Cleaning silver at home isn’t too difficult, and with these silver cleaning tips, it has never been easier. Especially as most of the cleaning tips below require items that you likely already have in your cupboards. So grab your silver cutlery, tableware and jewellery and find out the best ways how to clean your tarnished silver at home below.

How to clean silver at home


Aluminium foil and laundry detergent

This silver cleaning hack is perfect for slightly tarnished silverware and silver jewellery. It’s very simple just line a pot or a bowl with aluminium foil and add hot water. Add a tablespoon of laundry detergent (liquid) and stir until mixed. Drop all your silver into the bowl and leave for a minute. Take your silver out using kitchen tongs, rinse it with warm water and let it dry on a paper towel. The tarnish on the silver will be gone, and a natural shine will have been achieved.

Cleaning silver with Vinegar

Using vinegar in your sliver cleaning routine is a great way of speeding up the cleaning process. Even the most tarnished pieces of silverware can come back to life just by using vinegar. The combination of bicarbonate of soda, aluminium foil and vinegar make for a deadly foe to tarnish and will leave your silverware looking beautiful once more. However, vinegar is powerful stuff, so reserve it for your most tarnished pieces.

Bicarbonate of soda and aluminium foil

How to clean silver tableware

This silver cleaning tip is one of the best to have in your arsenal. You can use baking soda in so many cleaning tasks. Still, it works particularly well for cleaning silver cutlery, candlesticks and tableware. You will require to cover the bottom of a baking pan with foil making sure the shiny side is up. You’ll want to use ceramic or glass cookware for this and not metal. This prevents any unwanted chemical reactions. Then fill with water and baking soda. For every gallon of water, you need about 1.5 tablespoons of bicarbonate of soda. Then bring this mixture to the boil and pop your tarnished silver in for 15 seconds. Remove the silver using tongs and leave it on a paper towel to cool down. Repeat the process to fully remove heavily tarnished silver. However, this is a fantastic silver cleaning method for larger items. You can, of course, use a smaller baking tin and a smaller mixture of water and bicarbonate of soda for small silver items.

Water and cornflour

If your silver has lost its shine, water and cornflour can be used to restore it. Just make a thick paste with cornflour and water and apply it to your silver items. Then rub the items off with a towel to polish the surface. This will easily restore the shine to silver jewellery and silver cutlery.

Lemon juice and olive oil

This silver cleaning technique is perfect for a quick spruce up of your silver jewellery and tableware. Mix one teaspoon of olive oil with 125ml of lemon juice. You will need to dip a cloth into the earlier made mix and polish your silver. Once you achieve a wonderful shine, rinse and allow to dry.

How to clean silver jewleryHand sanitiser

Yes, you can clean silver at home using hand sanitiser too! As a lot of us have a lot more hand sanitiser around nowadays, it offers a quick solution if you need to polish a silver ring on the go. Squeeze a small amount of hand sanitiser onto a soft paper towel and gently rub your jewellery. This will remove any tarnishing and bring back the shine of your silver again. You shouldn’t use hand sanitiser on any jewellery that is encrusted with mineral stones as some of the ingredients in hand sanitiser may damage the stones.

Vodka

You can use vodka as a soaking solution for your silver. This method won’t remove heavy tarnish, but it does a good job of bringing lightly tarnished silver back to life. Just pop your vodka in a cup and soak your silver for about 5 minutes. Then dip a cloth into the mixture, remove your jewellery and wipe it. This silver cleaning trick is very easy, and it gives good results.

Beer

Pour some beer into a cup and let your silver soak in it for about 10 minutes. Then, remove your silver and rub with a clean cloth. This silver cleaning method is a very well-known trick, and it works surprisingly well. Sure, it won’t get rid of very heavy tarnish, but it can certainly bring silver back to life if it is lightly tarnished.

Bicarbonate of soda and water

As we said, bicarbonate of soda is one of the greatest cleaning products to have in your home. If your silver jewellery has stubborn, built-up tarnish, make a thick paste from bicarbonate of soda and lukewarm water. Apply the paste to any tarnished spots and leave it for 3 minutes. Then gently rub the paste to remove it. Use a soft toothbrush to reach into small and hardly reachable areas or it can also be done with a paper towel. Rinse your jewellery in cold water to remove the rest of the paste and then buff with circular motions for a lovely polish.

Vinegar and Bicarbonate of Soda

How to clean silver jewellery

If you’ve used the bicarbonate of soda and water trick above, but the paste hasn’t provided the shiny silver you were after, it’s time to bring in the big guns. Replace the water with vinegar in your paste. The vinegar will remove heavy tarnish, and the bicarbonate of soda will lightly buff your silver to a wonderful shine!

We hope these tips on how to clean silver at home help you remove tarnish and bring the shine back to your silver jewellery and tableware.

More cleaning tips

To find our more about our cleaning services from Cleaning Express, give us a call or send us a message via website or facebook.