how to kill mould

Always had trouble with mould around your home but do not know how to kill mould? Killing mould around the home is a tricky business. Removing mould, on the other hand, is fairly straightforward. However, these are not the same thing. Removing mould does not solve your mould issues. So, before we get to our solutions to remove mould, we are going to discuss what causes it and how you can stop it from returning.

What causes mould in the home?

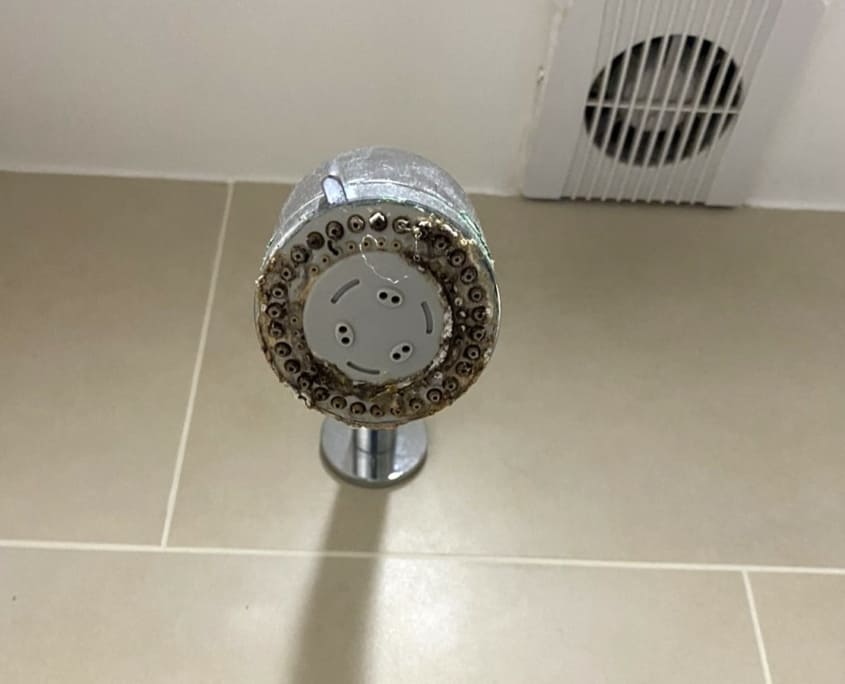
Mould in the home is caused by damp, and there are several types of damp that cause mould to build up. However, the most common in homes in the UK, and the one we’re going to focus on here, is condensation.

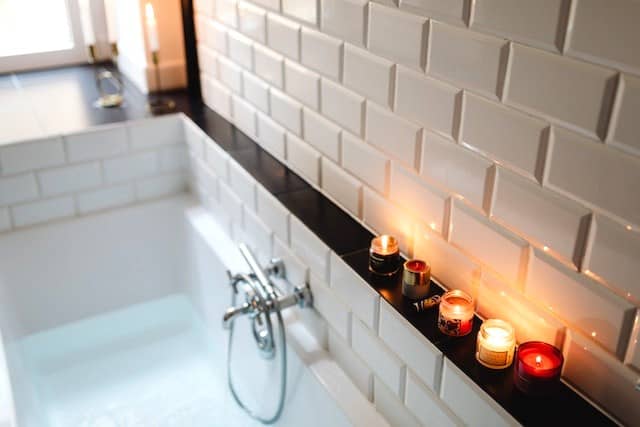
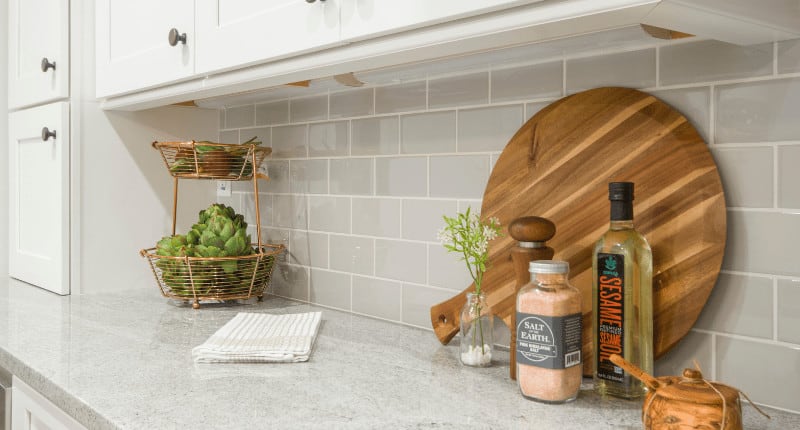
Condensation occurs when there is a lot of moisture in a home. Common places to find this type of damp are usually in places like the bathroom, kitchen or laundry room. However, it can be anywhere in the home where ventilation is reduced. Without proper ventilation, moisture in the home cannot escape, and this causes condensation.

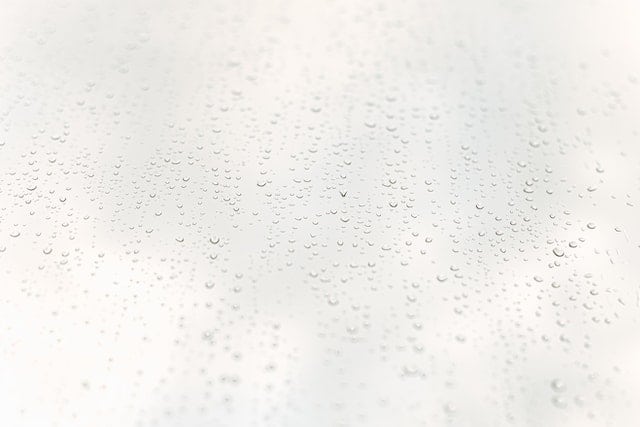
When there’s a big difference between the temperature inside the home and outside, the moisture in the air will settle on any cold surface. This is the same reason the mirror steams up when you have a shower. Air can only hold so much moisture, and as it hits a cold surface, it turns back into a liquid and forms droplets of water.

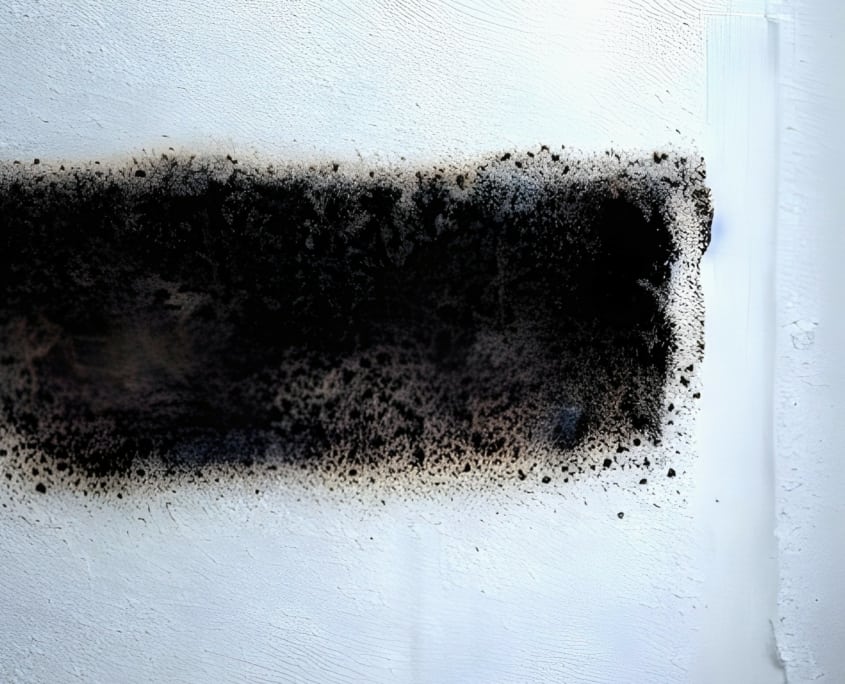
This water will cause damp spots around windows, mirrors and any cold surfaces and eventually cause mould unless the area is adequately ventilated. Mould grows in patches of black spots, known as black mould, and if your mould is caused by condensation, you’ll likely find them around the windows of your home. If the mould in your home is caused by another damp issue, you may find the black mould growing on your walls, ceiling, or flooring.

How to prevent mould in the home

The tips for removing mould we are going to give you in a moment are not preventing mould from returning. They are simply removing the mould that is there. The only way to prevent mould from returning is to treat the damp issue that is causing the mould in the first place.

How to stop condensation

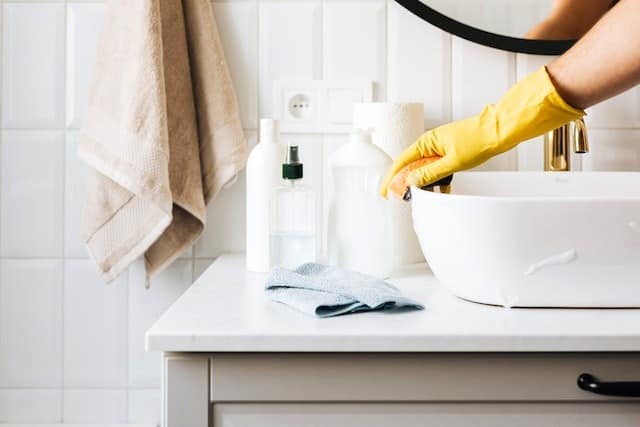
If condensation is the cause of your damp issues, better ventilation in a room can solve this. A dehumidifier can also help to reduce the water in the air, reducing condensation. As can heating your home evenly. If your dampness is not caused by condensation, the treatment of the damp can be much more severe and expensive. Again, this is not something we will ll go into here, but solving the damp issues causing your mould is the only way of preventing it in your home.

how to prevent mould and condensation

How to get rid of mould in the home

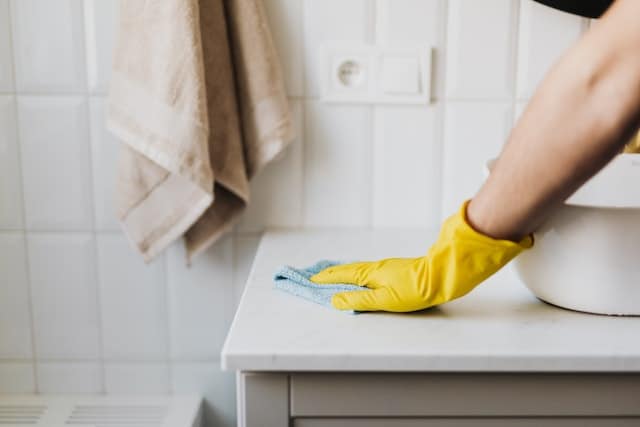
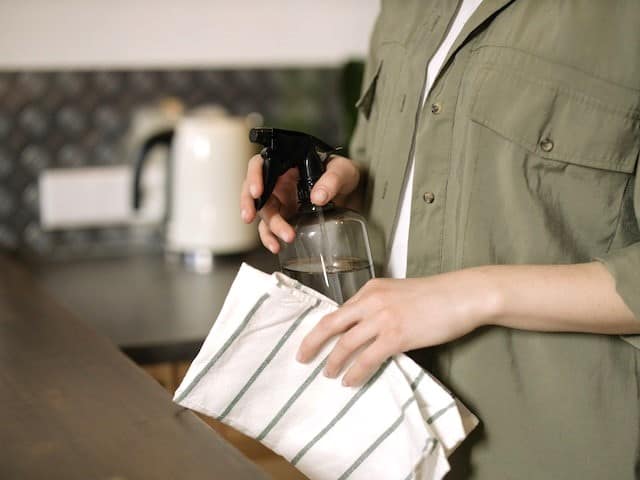
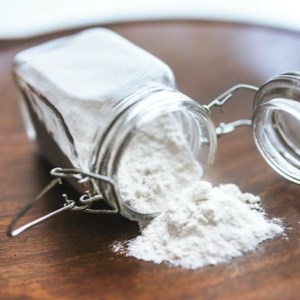
Removing mould from your home can be done with very simple cleaning solutions like bleach and a bicarbonate of soda and vinegar solution. Simply spraying the mould with the solution of your choice (bicarb and vinegar) and scrubbing it with a microfibre cloth is enough to remove mould from just about anywhere.

This is not a treatment for mould, nor will it stop the mould from returning. This is simply a way of removing the visible mould from around your home. From there, the cause of the mould and a treatment plan should be put in place to stop it from returning.

How to remove mould on walls

You can remove mould from the walls of your home with a bleach and water solution. This is one part bleach to four parts water. Spray the solution on the affected area of the wall, give it a scrub with a cloth and pat the wall dry afterwards.

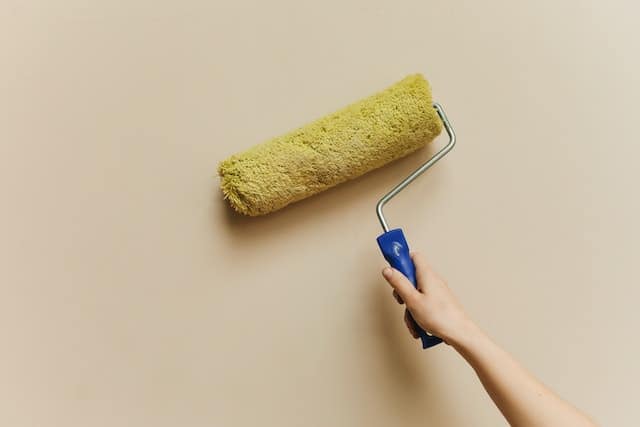
Just as above, though, this is not going to treat the mould. For that, you can use mould-killing paint. This does destroy the mould and works very effectively. Mould-killing paint is available in the most common colours, so there is no need to paint the entire wall with mould paint, just the affected areas.

A lot of people also swear by using Mould Magic Extreme to kill the mould around the home. This stuff is extremely powerful and works very well at killing visible mould, so it is well worth a try.

All of these methods will kill the visible mould in your home, but they will not stop it from returning. If the damp causing the mould issues in your home is not treated correctly, then mould will continue to grow in your home no matter what methods you use to remove it.

how to remove mould on walls

How to treat damp walls before painting

Before painting your walls, you need to treat mould and get rid of any black mould and mould spores. However, before you do this, the cause of the damp issues must be treated. Rising dampness, condensation, and any excess moisture or high humidity should be removed from the home. From there, you can clean mould off of your walls and prepare them for paint.

After treating the cause of the excess moisture, you’ll need to let all painted surfaces that have been affected by the mould dry fully. After this, you can prepare them for paint. Here is a step-by-step guide to treating damp walls, removing mould spores and black mould from your walls and giving them a coat of paint.

Remove mould and damp stains

Wash all infected areas with a good quality damp or mould removal spray. This will get rid of mould on the walls. To ensure the mould and mildew removal has been successful, you may want to repeat this step. Mould spray is widely available, but ensure that the one you use is good quality.

Repair cracks or holes in interior walls

You can now use a filler to fill all cracks and holes in the walls. Some people use a waterproof sealant for this task, but if the damp issues have been solved, a standard wall filler will work fine for this.

Sand down the area

Once the filler has dried, you can sand the area. You may find new areas that need to be sprayed with a mould removal spray during this process. You may also find new areas needing to be filled. The more time you spend sanding and reapplying mould spray and filler here, the better the end result will be.

Wash away the residue

Now the walls are nicely filled and sanded; you can wash away any residue of the mould spray and any other excess water or filler. You can use water and a damp cloth for this, but many people use a mould removal spray here to ensure that every mould spore has been removed. Leave your walls to dry overnight before the next step.

Apply a waterproof seal

Once the wall is dry, it is a good idea to apply an anti-mould paint as this will prevent the regrowth of mould spores. This works particularly well in rooms with poor ventilation or if you are drying clothes indoors in this area, for example.

You will need to prime or seal the wall before you paint anyway. Using a sealant designed to stop mould growth can massively help with your mould problems.

Paint your walls

Once the undercoat is dry, you can paint your walls as you normally would. If all the mould has been removed, there should be no discolouration of your new paint, and the internal walls with mould issues should look just as good as the rest of the walls.

paint walls mould

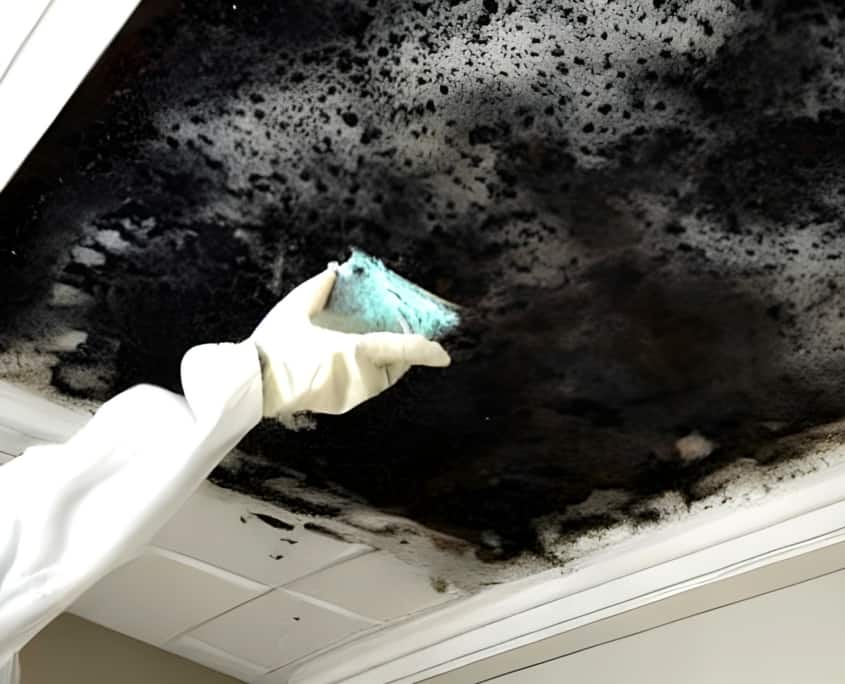
How to remove mould from ceiling

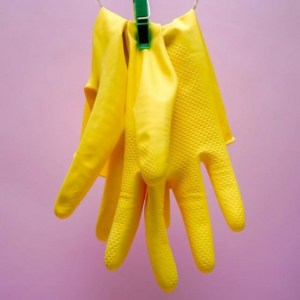
Before we tell you how to remove mould growth from a ceiling, we urge you to invest in long rubber gloves and a good protective mask. Wearing eye protection is also recommended. Oh, and please ensure the room you are working in has good ventilation. When you remove mould from any surface it can release mould spores into the air. If you have inadequate ventilation, you can breathe them in.

To get rid of mould from your ceilings, you can use a mild detergent in some warm water or make a solution of white vinegar or diluted bleach. Give the area a good scrub, leave it to dry and repeat if needed. This will not solve your damp problems, but it will remove the visual signs of the damp. You can then follow our steps for painting walls with mould above.

how to kill mould on ceiling

Does bleach kill mould?

Bleach does kill mould, but it does not stop it from returning. Sadly, when the conditions are right, mould will continue to grow no matter what cleaning solution, mould paint or mould and mildew cleaner you use. The only way to stop mould from returning is to solve the issue that is causing it in the first place. For most, this is condensation, and it is relatively easy to solve condensation issues with a bit more ventilation and a dehumidifier.

does bleach kill mould

Does vinegar kill mould permanently?

Vinger is fairly effective at removing the most common household moulds, but it does not kill every kind of mould. If the root cause of your mould issues is not treated, then mould will return no matter what you use to remove it.

Read our article on how vinegar can be used to clean silver.

does vinegar killl mould

Is bleach or Vinegar better to clean mould?

The mildly acidic nature of vinegar makes it better for killing mould than bleach. However, it cannot kill all kinds of mould found around the home. Also, if the damp conditions that mould loves are not solved, the mould will return no matter the cleaning product you use.

What kills mould the fastest?

Hydrogen peroxide kills mould faster than anything else. However, this can be very dangerous to use. If the area in your home with mould has poor ventilation, or you do not have the correct PPE, we would strongly suggest using a mould removal spray or white vinegar to remove your mould. In most cases, these are more than adequate to remove mould

Conclusion

We hope this look at killing mould in the home has been helpful. Just remember, removing the mould is fairly straightforward, but stopping it from returning can only be done once you have found the cause of the mould. For more cleaning tips, explore Cleaning Express some more. Or, for our help with all your home cleaning needs, get in touch today. We can be cleaning your home as early as tomorrow.


cat hair on carpet

A pet is a wonderful addition to any home, but you must also be thinking of how to remove pet hair from your carpet on a regular basis. I can say that my home would not be the same without my beautiful, handsome and very good boy, Polar. He’s a Labrador and brings so much joy to our house. However, with all of the joy that he brings, he brings about twice as much hair!

Once you have a pet, you spend as much time trying to remove pet hair from your carpet as you do enjoy their presence. Many people have figured out ingenious and creative ways of removing pet hair from carpets, many of which can be found below. We also have the easiest (and my go-to) option for quickly removing dog hair from carpets right at the end of this article, so stick around!


11 ways to remove pet hair from carpets


1. A lint roller

lint roller for cleaning pet hair

You can actually buy lint rollers with long handles that are designed for removing excess hair from carpets. They are wider than the typical lint roller that you use to remove pet hair from your clothes, but they work in the same way. They come with a roll of sticky paper, and as you roll it over the carpet, it picks up any hair, dust and dirt. Once the roller is full of pet hair, peel off that layer and reveal the next.

Lint rollers work great for removing pet hair from lots of surfaces. Many people reserve them for sofas and other soft furnishings, but they can be used to remove pet hair from your carpets too.


2. A hairbrush

hair brush to collect pet hair

Just as a hairbrush collects loose hair as you brush your own hair, the same is true for the pet hair on your carpets. Simply run the hairbrush over embedded fur on your carpet, just as you would if you were brushing a giant’s head and watch as it captures all the loose hair.

Now, this method takes some elbow grease. You’ll need to get on all fours and just go for it. This is why many pet lovers only use this pet hair removal technique for smaller spaces. For example, this method works great on the stairs, and it doesn’t actually take as long as you think.

Once you get the rhythm down and start brushing it, the pet hair will come up very quickly. My dog loves to sit on the stairs, and as a result, there is always hard-to-reach pet hair on my stairs. This method works perfectly for removing stubborn pet hair from carpets no matter where you use it, though.


3. Rubber gloves

yellow rubber gloves


Do you know the bumps on rubber gloves that are designed to give you extra grip as you wash up? Well, these little bumps on a rubber glove are excellent for drawing pet hair out of the carpet.

Put on your rubber gloves, and start running your hands over your carpet. You’ll quickly see how much pet hair this method can lift up. If you do this method, it is worth taking a bin bag around with you to collect all the pet hair. Thin latex gloves offer an impressive amount of grip and allow you to pick up dog and cat hair too.

Again, this is a rather labour-intensive method for removing dog and cat hair, but it does work great for smaller spaces. It works particularly well in the car. The carpets in cars love to cling to pet hair, yet the rubber glove method can free it up nicely and quickly.


4. Balloons

static from balloons

Okay, hear me out. This method of removing cat and dog hair from a carpet may sound like a crazy idea, but if it works, is it really crazy? I’m sure all of us have rubbed a balloon on our clothes and then put it over someone’s head and watched their hair go crazy, right?

Well, instead of placing it over that person’s head, place it over your carpet instead. The static charge on the balloon will lift the pet hair from your carpet just as it does during the hilarious party trick. It works surprisingly well, although it is difficult to reach into tight spaces with a balloon!


5. Fabric softener

removing pet hair using fabric softener

This pet hair removal method takes a bit of prep, but it is well worth it. You need to make a solution of liquid fabric softener and water in equal parts and pop it in a spray bottle. Yes, the same fabric softener you use in your washing machine. Don’t worry; there is a method to this madness.

Then, spray this solution over your carpet in a very light mist. You do not need a lot of this solution. A very light misting will do. Once the fabric softener is dry, just vacuum your carpets as normal. Works like magic, right?

Well, it isn’t actually magic. Fabric softener is designed to loosen up fabric, allowing water and detergent to pass through your clothes during the wash. So, when you apply it to your carpet, it loosens the carpet’s grip on the pet hair, allowing the vacuum to pick more of it up. This works a treat, and once you have the spray bottle full of the solution, you can keep reusing it over and over again.

6. Baking soda

baking soda or bicarbonate

The baking soda method or bicarbonate of soda method is one of the easier methods you can use to remove dog hair from your carpets. Just grab your bicarb and sprinkle a bit over your carpets, making sure you get good coverage.

You only need a thin layer of bicarb, and then just leave it to work its magic. This will only take a few minutes. You can then vacuum up all of the bicarbonate of soda. The baking soda will cling to the dog hair and pull it out of the carpet.

If you leave the baking soda on your carpets for longer than a few minutes, it will also get rid of any odours in the carpet as well as remove hair. Baking soda acts as a deodoriser, so it is brilliant for getting rid of the smells that your pet can leave behind on your carpet too.

Baking soda has a wide range of effective uses, please have a look at our how to clean silver at home article to see other cleaning uses of bicarbonate.

7. Hair magnet

A pet hair magnet is actually not a magnet at all. Instead, it is a rubber squeegee that you draw over your carpets to pick up hair. The rubber blades on a PetMate magnet are thicker than standard rubber squeegees, although you can achieve a similar result if you only have a standard one.

Many people keep one of these in their car as it is one of the best things to use for getting pet hair out of car carpets. As these carpets are extremely clingy, using something like this makes a huge difference.

8. Carpet rakes

A carpet rake is an excellent tool for removing cat and dog hair from carpet fibres. It is basically a hairbrush on a long handle. There is a choice of plastic or stiff metal bristles on carpet rakes which delve deep into the pile of carpet fibres as you sweep it. The plastic bristles provide a gentler action, and the metal ones ensure all stubborn hairs are drawn out.

A carpet rake can bury deep into the pile and unearth even the most hidden hair. As it draws hair out of the carpet, the head collects it. All you need to do is remove the collected hair from the bristles periodically during use. Carrying a bin bag around makes this quick and easy.

9. Your pet’s hairbrush

pet hair brush being used on a dog

To remove dog hair from the carpet, why not use the brush you use for your dog? While this can be a very labour-intensive way of getting rid of hair, it is excellent for small spaces. As a dog owner myself, I have resorted to using my dog’s brush to brush the stairs in the past.

This plain hairbrush works excellently, and once you get in a rhythm, this method to remove dog hair really doesn’t take that long. As the metal and rubber bristles of the brush are quite long, it allows you to get deep into the carpet as well. So, it is a very thorough way of getting rid of dog hair.

10. Professional carpet cleaning machines

A professional carpet cleaner can be used to get rid of all of the hair, dust and dirt that your pet has pushed deep into your carpets over time. Hiring professional carpet cleaners to come to your home to clean your carpets periodically can make your carpets look brand new. Or you can hire a carpet cleaning machine for a day.

If you do like to keep your carpets looking as spotless as possible, you could consider investing in a wet and dry vacuum cleaner. These wet cleaning methods ensure that water and cleaning solution draw all the fur out of your carpets and keep them looking incredible for longer. This is one of the more expensive solutions to remove dog hair, but it is one of the best.

11. Anti-static spray

anti static spray

This spray works so well on dust and hair that it seems as though it is magic. Carpet fibres and hair have a static charge that gives them both natural gripping properties. So, when the two are brought together after your pet shakes, they can bond really well, which is why it’s hard to vacuum pet hair up.

Spraying anti-static spray on your carpets regularly prevents them from having a static charge, so dust and pet hair doesn’t bond as well to the fibres. Now, static spray really does work very well, which is why we’re mentioning it. However, this method can get costly over time, and you really need to research the sprays you are buying to ensure they won’t harm your carpet or your pet.

The easiest way to remove pet hair from carpet

For me and many other pet owners, investing in a vacuum that is designed to remove pet hair is the best way of getting rid of every single piece of pet hair that your lovely friend leaves behind. For so long, I resisted the urge to buy a pet hair vacuum cleaner, but I am so glad I did. I have a Shark pet hair vacuum cleaner that has powered brushes that make light work of all of Polar’s hair and any dust and dirt in the carpet as well. It is actually shocking to see how much hair a vacuum cleaner like that picks up.

Now, this certainly isn’t a sponsor for Shark, but my experience with their pet hair vacuum cleaners has been outstanding. If you are interested in buying a pet hair vacuum cleaner, though, the Telegraph have tested them all in this review.

In conclusion

There are several fantastic ways of getting rid of hair from your carpet. I have found that a good quality vacuum cleaner is the best option for me. Investing in one of these vacuum cleaners can make short work of bringing your carpets back to life.

If you don’t have the budget for a pet hair vacuum cleaner right now, though, hopefully, the list of ways to remove dog hair from carpets above has been helpful. We particularly enjoy the baking soda method as it not only gets rid of the hair but also lingering odours.

We hope this look at removing pesky pet hair from your carpets has been helpful. There are lots of methods for pet hair removal, and if none of the ones we’ve mentioned above takes your fancy, you could hire us, Cleaning Express to come and give your carpets a good cleaning. Our carpet cleaning service will get rid of every pet hair, every stain and any evidence you own a pet. Other than the pet, of course!

Please also read: how much does carpet cleaning cost

Ah, the toilet, a humble place of reflection, relaxation and possibly radiation, depending on what you ate the night before! The toilet is a place that all of us will visit daily, yet many of us still struggle to keep clean even when you have a toilet brush! One of the biggest issues for any toilet in the UK, a plague on our toilets, if you will, is limescale.


Removing stubborn bits doesn’t have to be difficult, though. Below we have some tips on cleaning a toilet and getting rid of pesky limescale for good. These methods work on all limescale around the home, too. So don’t be afraid of grabbing some rubber gloves, taking a deep breath and fighting limescale in every room of the home! Before we get to how to remove limescale from a toilet, we first need to understand limescale. Its likes, dislikes, and why it is even in our toilets in the first place. By knowing and understanding these unsightly stains, we will be better equipped to tackle it head-on.

What is limescale?

Limescale is a chalky substance that loves to attach itself to anything it comes in contact with. From toilet bowls to glass shower screens and taps, limescale can build up on pretty much every surface that it comes in contact with.

 Limescale stains

As you likely know, limescale is in the water that we use in the home. Well, sort of. You see, calcium bicarbonate is in our water. This is a soluble chemical present in all hard water areas in the UK. Calcium bicarbonate turns into calcium carbonate over time, and it is this little creature that we know as limescale.

 Hard water supply

Around 60% of the UK is considered a hard water area, so calcium carbonate affects over half of the population. And London, where Cleaning Express is based, is no exception to this. As a result, our expert cleaners have years of experience fighting this foe and have some clever cleaning hacks to help you quickly and easily get rid of the limescale from your toilet.

How to remove limescale from toilet bowl

How to remove limescale from a toilet below waterline

Removing limescale from below the waterline in a toilet can be very tricky. After all, any cleaning products you add to the toilet are diluted by the toilet water. While you could turn off your water supply and let the toilet fully drain to gain access, there is an easier method that works even without removing the water from your toilet bowl.

The best limescale remover

We’d like to introduce you to two of the best cleaning products to have in your cleaning cupboard. These two cleaning products can be used separately, but when you bring them together, it is like the Avengers of cleaning! Every single home in the UK should have these cleaning products at its disposal, and they can be used everywhere limescale lives around the home. We are, of course, talking about bicarbonate of soda and white vinegar!

How to mix vinegar and baking soda

Wear gloves! To use bicarbonate of soda and vinegar to clean limescale from below the waterline, you first need to make a paste. Grab a bowl and add equal parts of bicarbonate of soda and vinegar. For this cleaning task, the more, the merrier, pour vinegar (about 1 litre) and a few cups of bicarb will work fine. Give the solution a mix until you have a paste. Then, add it to the toilet bowl and leave it to soak for as long as possible, at least an hour. However, we know this is a time-sensitive cleaning operation! If you have two toilets in the home, though, cleaning one and asking everyone to leave it alone while you do will ensure better results.


As the toilet is soaking, the paste will begin to break down the limescale and anything else in the toilet. Next up, you can grab your toilet brush or a strong bristle cleaning brush and some gloves and give the toilet a good scrub. As the limescale from your toilet is removed, you’ll see the colour of the water change. This is good; the solution is working.


Now, because of the paste, the water in the toilet will probably be murky, so you won’t be able to see whether the limescale has been completely removed. So, give the toilet a good scrub for several minutes, then flush the toilet and let the water settle. You should see a sparkling toilet, cleaner than you’ve ever seen before. If the limescale build-up was very extreme, you may need to repeat the process, but in most cases, the limescale below the waterline in your toilet should now be gone! Regular cleaning will now help you stay on top of the limescale and prevent it from returning.

How to remove limescale from the toilet rim

Removing limescale from the toilet rim can be very tricky as you need a cleaning solution that can defy gravity and cling to the rim of the toilet. Thankfully, you have one. Create a thick paste of vinegar and bicarb, and just before you apply it to the rim of your toilet, give the rim a wipe to remove any water. Then, once the rim is dry, cover it with the solution. Drying the rim first will ensure that the solution can stick. After the solution has had time to work (again, an hour of soaking will give the best results), you can scrub the toilet rim to remove the limescale buildup.

How to remove limescale from a toilet bowl

Many bowls have a thin line of limescale deposits on the back of the toilet bowl where the water comes out of the tank as you flush. This is really common, and our old friend’s vinegar and baking soda can come to the rescue here too.

How to remove limescale from toilet trim

The process for cleaning this part of the toilet is exactly the same as the rim. Create a thick paste, dry off the area, apply the paste, leave it to soak, and get to scrubbing. You’ll quickly notice the limescale build-up has broken down and been removed.

Using lemon juice

An alternative way to remove stubborn stains is lemon juice! Vinegar can be used with lemon juice. This combination works great and. The lemon juice needs to work its magic for about an hour, as when soaked it helps break down the calcium carbonate. After that, do some scrubbing and see the difference!

Using coca cola

Yes, the acidity of coca cola helps too. Pour coca cola and let it sit overnight. Flush the toilet and scrub if needed.

How to prevent limescale from returning

Once you have gotten rid of the limescale, we’re sure you’d like to keep it away. The best way to keep toilet limescale away is regularly cleaning your toilet. All of the usual products will work great for this, toilet bleach, for example. Try and clean your toilet every week, at least, and don’t be afraid of putting on some gloves and putting in some elbow grease. The cleaner you can make the toilet on a regular basis, the less likely it is that limescale will return.

Limescale removal methods to approach with caution

There are several methods of removing limescale off of the toilet that we would like you to approach with caution. The methods themselves are sound in principle but a little tricky to get good results with and could potentially damage your toilet if done incorrectly.

Using sandpaper

To remove stubborn stains from bowls, some people swear by using sandpaper, and this does make sense. Using an abrasive like sandpaper will remove limescale buildup and make your toilet look great. However, it is very easy to scratch the toilet by using sandpaper. And any scratches will not only look bad but also give the limescale another place to cling onto.


If your limescale build-up is extremely bad and you have tried every method in the book to get rid of it, then using sandpaper may be the only way to remove it. However, please be careful, and try to avoid touching the porcelain as much as possible.

Using a pumice stone

The same reason applies to using a pumice stone to clean thick limescale off of a toilet. While the method is sound and does work very well, you can easily damage your loo and the porcelain if you don’t use it correctly. So, we’d recommended keeping this trick in your back pocket just in case your stubborn limescale ever builds up too much for other methods to deal with, but we wouldn’t recommend trying this one first.


We hope this look at how to remove limescale from a toilet has been helpful. For more tips, please explore Cleaning Express further. Or, if you aren’t as excited about removing limescale as us, and we can completely understand if you are not, why not give Cleaning Express a call and book in for a deep clean? We’ll get rid of your limescale and a lot more!

Additional reading

How to clean a bathroom


daily office cleaningIf you’re looking for office cleaning services, you may wonder when the best time to clean your office is. Having a clean office is great, but if the cleaners interrupt your staff while working, it can cause issues. So, choosing the perfect time to clean your office is critical.

The perfect time for office cleaners to come to your office depends on you and your business. However, below we’ve offered some advice on choosing when cleaners come to your place of work. Remember, Cleaning Express is always more than happy to customise our cleaning services for our customers. So, if you choose to have our cleaners come to your office in the morning but later wish to change to evening cleaning sessions, just let us know, and we’ll make it happen.

What is the best time to clean offices?

You have several options for commercial cleaning services when it comes to the time of cleaning, and Cleaning Express is delighted to accommodate you. Your options for office cleaning services are:

Early morning office cleaning

commercial cleaning best times Early morning office cleaning sessions are ideal if you want your office to look perfect each time your staff arrive to work. Any bathrooms, food prep areas or kitchens are also completely spotless, so your team can feel safe and enjoy a sparklingly clean environment.

While we do our best to keep our office cleaning sessions as unobtrusive as possible, things like vacuuming can be pretty noisy. So, if you share your office buildings with companies that start work earlier than you, having cleaning sessions in the morning can cause some disruption to their working day. Also, if you have staff that enjoy getting to the office early, this can mean they are less focused in the morning.

Daily office cleaning

Many people choose to have their offices cleaned during non-working hours to ensure that their staff can focus, and we would always recommend that vacuuming, wiping desks, emptying bins, and other things should be done during non-working hours. However, we can also provide daily office cleaning. The daily office cleaner won’t do any noisy cleaning tasks but can be there after lunchtime to clear up the kitchen and do quieter cleaning tasks to keep your office looking excellent throughout the day.

Evening office cleaning

Best times for office cleaning services

Most of our office cleaning customers use our services in the evening when all their staff have gone home. Many people prefer the cleaning to take place after a busy day as it means when they return to work the next day, the office is fresh and clean again.

Having your office cleaned in the evening also prevents your staff’s presenteeism and burn-out. They can use the cleaners as a sign that it is time to go home and come in fresh the following day. This can also work better with other offices in the same building. Most companies have a similar clocking-out time, so the cleaners can do their work without disrupting anyone.

Need more than regular office cleaning?

Having regular office cleaning services is an excellent way of keeping on top of all the cleaning tasks that your company needs to look fantastic and be a safe and pleasant place for your staff to work. However, occasionally, you need a bit more cleaning than a regular office cleaning can provide. This is where our deep cleaning services come in handy. A team of cleaners can come to your office (at a time that suits, of course) and do a top-to-bottom clean. Every corner, desk, cupboard, and carpet can be thoroughly cleaned to offer the most inviting space for your staff possible.

Cleaning Express

Get a quote for office cleaning from Cleaning Express

Whether you feel early morning or evening cleaning sessions are suitable for your office, Cleaning Express can be there. We’ll customise our office cleaning services to suit your needs perfectly, and with our fully trained cleaners, your office will look amazing for your staff and customers. If you are looking for quality cleaning services in London and expect high standards of commercial cleaning from a company that cares about its employees, please get in touch with us. Cleaning Express is passionate about fair pay and has been nominated as a Living Wage Recognised Service Provider. We believe that better pay attracts and retains higher-quality staff. To learn more about Cleaning Express and our excellent office cleaning services, you can explore our website and call us on 0203 633 0390 or drop an email with your enquiry to commercial@cleaning-express.com. We offer competitive prices on all our cleaning services and have the best cleaners in London.

Read also:

When moving into a new home, it’s great to find it perfectly clean and ready to start making memories. Sadly, some people don’t give the house a good clean before they move out, and your first few days in a home can lead to doing a lot of cleaning to make the house more inviting.

Whether you want your new house to look fabulous before you move in, or you’re moving out and want to treat the new owners to a clean slate, you may be wondering which cleaning services are the best to use. Well, if you’re looking for a cleaning company to help with your move, there are some cleaning services that you should look for that will help with this moving in or moving out process.

What to look for when choosing moving home cleaning services


moving home cleaning services


Deep cleans

A deep clean can be the perfect cleaning service to use if you are moving into a new house. If the last owners haven’t left the house in a brilliant condition, this cleaning service can take it back to a clean slate for you. It will also help you if you’re moving out of a house and want to leave it in an excellent state for the new owners.

During a deep clean, every area of the home is cleaned. This includes commonly missed spaces like behind the toilet, the skirting boards, inside cupboards, and much more. Deep cleans get into every corner and closet of the home. A deep clean service is best before moving any of your stuff into the house (or just after you’ve moved it out). That way, the cleaners can focus on the essential areas. So, the cleaning company you choose should offer deep cleaning services as these will be handy when moving.

End of tenancy cleans

cleaning services moving outIf you own your house, you may think that end-of-tenancy cleaning won’t be able to help you. However, a cleaning company experienced in end-of-tenancy cleaning can help when moving into a new house or moving out.

These cleaning services are designed to get a property ready for the landlord to rent it again straight away. So, they are ideal when moving in or out of the property you’re buying or selling. They are very similar to deep cleans, but we use a checklist to ensure that our cleaners don’t miss any areas. So you can move into a fresh, clean home and make it yours straight away.

While some cleaning companies may not offer their end-of-tenancy cleaning services to people moving in or out of properties they own, Cleaning Express is always happy to help. We customise our cleaning services to suit our customers’ needs and are more than happy to use our experience in end of tenancy cleaning to prepare your home for the next step.

After building work cleaning

If you are planning on having building work in your new home before you move in, this cleaning service is just about the best one to book right before you move in. Building dust can get everywhere, so we designed this after-building cleaning service to ensure your home is dust free and clean after any building work.

We use industrial vacuums to ensure that dust and dirt are gone from your home after building work. While we’re happy to offer this service to any of our cleaning customers, it can be a brilliant service if you’re remodelling a home before you move in.

Carpet cleaning

Cleaning moving in

Lastly, we have carpet cleaning services. Carpets hold on to dust and dirt, and a quick hoovering before you move in or out will never be enough to make the carpets look new again. This is where carpet cleaning services shine. You can add this cleaning service to just about any of our other cleaning services or use it as a standalone service. We use an industrial carpet shampooing machine to draw our dust, stains and grime and make the carpet look new.

Cleaning Express offer all of these cleaning services and a great deal more. Our cleaning team can make moving home much less stressful. So, if you’re moving out of a house in London or moving to a place in London, we have every cleaning service to ensure your home looks lovely. We also have regular domestic cleaning services to keep your new home looking great once you’re settled. Give Cleaning Express a call today on 0203 633 0390 or send us a message via website or Facebook .to learn more about the cleaning services you need when moving in or out.

oven cleaning tips without chemicalseasy oven cleaning without chemicals 
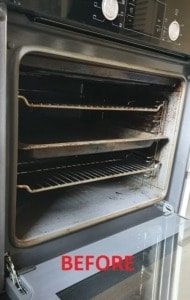
Cleaning the burnt food and grime in an oven has been causing people headaches ever since the oven was invented. However, there are some tips that make cleaning an oven a lot easier, and we’ll be looking at these oven cleaning tips today. We will also have a step by step cleaning guide that uses natural, readily available cleaning supplies. There’s no need to use harsh cleaning chemicals to clean your oven; all of the cleaning can be done with things you’ll find in the baking aisle of the supermarket.


How to clean an oven without chemicals – a step by step guide


Boil the kettle and remove the racks

The first step of cleaning an oven is removing the oven racks. You can let the racks soak in a mixture of vinegar, bicarbonate of soda and water in the sink. A 3:1 mix of water and vinegar and a good sprinkling of bicarbonate of soda will make quick work of dissolving any burnt-on food on the racks.

Next, turn the oven to about 220 degrees Celsius and boil the kettle and fill an oven-safe bowl with the boiling water. Place this bowl in the bottom of the oven, close the door and leave it for about an hour. The steam will flow around the oven and loosen all of the burnt-on food and make it really easy to wipe away afterwards.

Make a cleaning solution

How to do oven cleaning without harsh chemicalsOnce the boiling water has been left to work for an hour, you can remove it from the oven and begin scrubbing the food away. This is a lot easier with a very simple cleaning solution. Mix a 3:1 water to vinegar solution in a spray bottle, and grab your bicarbonate of soda again.

If you notice any really stubborn burnt-on food, spray the solution onto it and sprinkle some bicarbonate of soda over the top. Let this sit as you begin scrubbing the rest of the oven.

Elbow grease time!

The boiling water trick should have loosened most of the burnt-on food in the oven, but some elbow grease will still be needed to remove it completely. Spraying a good amount of your natural cleaning solution into the oven and letting it soak in for 10 minutes before you start wiping it away can help with the more stubborn areas. However, give it a try. You may find that the boiling water has released the food enough to make cleaning it straight away really easy. If not, you can either scrub like your life depends on it or let the vinegar and water soak into the food further. You can add some bicarbonate of soda over the top of the solution to increase its effectiveness too.

Keep wiping away any food and loose bits of grime, and you will quickly see the inside of your oven shine again. A microfibre cloth is perfect for cleaning an oven, but a sponge will work well too. Some people say to use a metal scraper or spatula to clean your oven, but we wouldn’t recommend this. Using metal can damage your oven. If the food is burnt on enough that you feel you need to use something like a scraper, see the next section.

Really stubborn food

oven cleaning without chemicalsIf you have very stubborn areas of burnt-on grime in your oven, you may want to repeat the boiling water step once you have removed as much as you can. You can also make a paste from the bicarbonate of soda and leave this to soak into problem areas. Just add some bicarbonate of soda into a bowl and slowly add water, mixing as you go. Once it has a paste-like texture, cover all of the problem areas in the oven. You can also use this bicarbonate of soda paste on the glass door of your oven if required. However, if you follow the cleaning steps above, your oven door should be quite clean already.

When it comes to removing this bicarbonate of soda paste, just moisten a microfibre cloth and wipe it away. The bicarbonate of soda will begin to dissolve and take the grime with it.

Don’t forget the racks

easy oven cleaning without chemicalsoven cleaning without chemicals
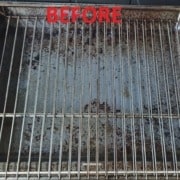
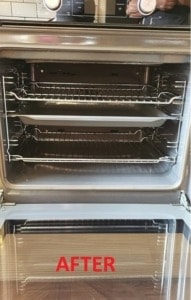
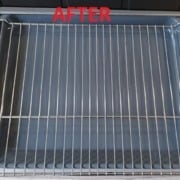
Now that your oven racks have had plenty of time to soak in the vinegar, water and bicarbonate of soda, you will probably be able to wipe away the grime and food very easily with a microfibre cloth. Leaving the racks until the very end gives them time to naturally soak in the cleaning solution, so a quick wipe is usually all that’s needed.

Cleaning an oven the natural way

This is the easiest way of cleaning your oven, by far, and it is totally natural. The boiling water trick is the key, though. Leaving the boiling water in the oven for an hour with the heat on just before you clean it really helps to loosen all of the burnt-on food and often results in a very quick cleaning job that doesn’t require any harsh cleaning chemicals at all.

Of course, if you want to use a chemical oven cleaner, you can, but use the boiling water trick before you use it. All the boiling water is doing is releasing the hold of the burnt-on food on the surface of your oven. So, it simply helps whichever cleaning solution you choose to use after this.

To recap

oven cleaning tipsCleaning an oven seems like a near-impossible task, but with the right tips, it is actually a very easy and stress-free cleaning job. To clean an oven, all you need to do is:

Remove the racks and soak them
Fill a bowl with boiling water and pre-heat the oven
Leave this in the oven for an hour
Make a cleaning solution
Spray the solution in the oven (let it soak in for 10 minutes if needed)
Wipe away the burnt-on food
Clean the racks
Have a cup of tea

More cleaning tips

We hope this look at how to clean an oven has been helpful. Cleaning Express also provides one off cleaning service for your oven cleaning needs. Remember, no matter whether you use a chemical oven cleaner or a natural solution, use the boiling water trick. It will make things so much easier! Also, our professional cleaners can clean your oven as part of our cleaning services, such as domestic cleaning services including regular cleaning, or deep cleaning, and of course end of tenancy cleaning. Give Cleaning Express a call or send us a message via website or Facebook. Or for more amazing cleaning tips like this one, please explore our website further.

Have you ever through to yourself how actually clean is your house? If you have ever moved your sofa or looked under your bed for something you’re sure you stored under there a while ago, you may know that our houses are not as clean as they may look. Most of our houses look nice and clean on the face of it, but when you pull back the curtain (or sofa in this case), it is anything but clean. A recent study of adults in Britain has shown that only about 34% of us clean once a week. 29% of us clean fortnightly, and only 13% clean more than twice a week!

A fifth of the people asked in this research stated that they only clean their homes when guests come round. This means that they are typically only cleaning the areas that people can see, which is what many of us do, even if we do the cleaning more regularly. But what does this mean? Well, it means that many hidden areas of our homes are dusty, of course. But dust is relatively harmless compared to what else could be lurking in the unclean areas of our homes!

how clean is your home

Let’s take the toilet as a good example of a very clean and unclean part of our homes. If you’re like a good portion of us, you’ll give the toilet bowl a good scrubbing when you are cleaning. You will also likely clean the seat and give the cistern a wipe down too. In the survey I mentioned above, 37% of people said they don’t clean behind the toilet! As you can imagine, there’s a lot more than dust behind your toilet! Bacteria of all kinds are lurking there, but they aren’t just behind your toilet.

We all know the importance of wiping down our kitchen surfaces and our chopping boards, this stops the spread of many bacteria. However, only 34% of people clean their fridges. Bacteria can be very present in your fridge, especially when you don’t clean it! The same is true for the oven, and 32% of us don’t clean that regularly either!

Now more than ever, cleaning is vital in a home. Ridding your home of bacteria ensures that it is a safe place for your family. So, when you are cleaning next, pay attention to areas that are commonly missed, for example:

Behind the toilet
The oven and fridge
Under the sofa
Under the bed
The tops of wardrobes and shelves

Cleaning in these areas, and the areas you regularly clean ensures that there is a lot less bacteria and harmful viruses in your home. If you are now extremely worried about your home’s cleanliness, you can, of course, call in the experts. Cleaning Express provides loads of cleaning services, such as domestic cleaning services including regular house cleaning, deep cleaning and antiviral disinfection cleaning services. So, if your home needs a cleaner, give Cleaning Express a call or send us a message via website or Facebook. One of our highly skilled cleaners can be with you as quickly as tomorrow!

Our cleaning customers ask us a lot of cleaning questions throughout our travels through London cleaning homes and businesses. And one of the cleaning questions we get asked a lot is about cleaning TV screens. Cleaning a TV screen needs to be done carefully and with the right cleaning equipment. If not, you could damage your TV. So, today, we’re going to explain how our cleaners clean TVs so that you can clean yours correctly without damaging it. We’ll also look at what not to use to clean your TV, which is actually a much longer list than what you should use to clean it.

how to clean a tv screen

Screen cleaners

There are dedicated screen cleaners that you can buy for TV and computer screens. They come in an aerosol and a wipe. While these cleaning sprays do work, they aren’t recommended for every type of TV. Most of these TV screen cleaners can be used on LCD and plasma screens, but you should check that the cleaner you choose is suitable for your TV.

TV screen cleaning sprays and wipes are great to use if you have tried to clean your TV with another cleaning solution. If you have streaks all over your TV, for example, a screen cleaning spray should be used to remove them.

Here’s how to use a spray TV screen cleaner:

Use a small amount of the spray cleaner, and spray it onto the cloth, rather than the TV. Use a microfibre cloth for this task. Fold the microfibre cloth and try and keep one side of it dry. Start from the top of the screen and work your way down, wiping from side to side. Once you reach the bottom of the TV screen, use the dry part of the microfibre cloth and repeat the process. This should remove any leftover cleaner on the TV screen and ensure you have a streak-free result.

Screen cleaners claim to remove nicotine stains, smudges, fingerprints and grime from your TV, and most do that job very well. However, our cleaners have found a much easier way of cleaning TVs that doesn’t require a special spray. In fact, all it involves is something you likely already have in your cleaning cupboard.

A microfibre clothhow to clean a tv

A clean, dry microfibre cloth does the best job at cleaning a TV screen. It can remove dirt, dust and grime, and even stubborn stains like nicotine. Our cleaners have been using microfibre cloths to clean TV screens for years, but it is recommended by loads of cleaners and even TV manufacturers. Samsung even recommends using a microfibre cloth on its TVs because this method works so well.

How to clean a TV screen with a microfibre cloth

Cleaning a TV with a microfibre cloth is as simple as it sounds. However, our cleaners have a few tips for you to make it go even easier. As you aren’t using any sprays or any liquid at all, you don’t need to worry about streaks, but you do need to consider where the dust will fall. So, when cleaning a TV, always start from the top of the screen and work your way down. You should dust the top of the TV before you start with the screen too. That way, the dust will fall onto the areas you haven’t cleaned yet, and you can wipe it away as you make your way down the screen.

If possible, use a fresh and clean microfibre cloth for your TV. TVs love to attract dust and grime, so any dust in the microfibre cloth already could cause you an issue. You don’t need to use a lot of pressure when cleaning a TV screen. In fact, too much pressure can damage your TV. Just take light passes, gently wiping the screen. Go side to side, as this ensure you catch all of the dust while wiping the TV. If you notice some stubborn grime, gently focus on the area. The microfibre cloth will pick up the dirt, but it may take several light passes to do it.

To recaphow to clean flat screen tv

Use a clean microfibre cloth
Clean the top of the TV first
Gentle passes starting from the top of the screen
For stubborn grime, take multiple, gentle passes
Move from side to side to catch all the dust

What to avoid

Unless your TV screen is incredibly dirty, there is really no need to use anything other than a microfibre cloth. It will clean your TV very well and remove any dust and grime really easily. Avoid using any cleaning solutions that have alcohol, ammonia or benzene in them. Window cleaner, for example, should never be used on a TV. Many people swear by using alcohol on their TV screens, and this can work, but it can also damage certain styles of TV, so if you can avoid it, we would recommend it.

If you have fingerprints or streaks on your TV screen and you need to get them off quickly, you can use vinegar to do so. Spray a small amount of vinegar onto a microfibre cloth and wipe the TV gently. Have a spare clean and dry microfibre cloth handy, and use this to remove any residue once you’ve cleaned your TV. This will ensure a streak-free TV ready for watching your favourite programmes.

More cleaning tips

In conclusion

If your TV is really dirty, or it has lots of streaks on it, use a dedicated TV screen cleaner to remove these. Just make sure the TV screen cleaner you buy is suitable for your style of TV. If your TV is just a bit dusty, use a dry, clean microfibre cloth to remove all of the dust.

For more cleaning tips from our excellent cleaning team, please explore Cleaning Express further. Or, to have our domestic cleaning team come into your home or business, get in touch. We have every cleaning service you need to keep your property clean and safe. See our reviews on TrustPilot.

If you would like to know how to clean a bathroom just like professional cleaners, then you are in the right place. We are giving you some house cleaning tips on how to clean the bathroom. They are very simple and easy and will make cleaning a bathroom stress-free and enjoyable.

cleaning of the bathroom

How to clean a bathroom: Step-by-step

Declutter – Empty the bin, put items away and start dusting

First, tackle the smaller tasks like putting shower gel bottles and shampoos in their rightful places, emptying bins and dusting. It is a good idea to give any shelving a quick wipe down as you are doing this to ensure they are dust-free. You can simply damp a microfibre cloth to dust shelves or cabinets, and this also works great in the corners of the room and on skirting boards too.

Start cleaning the shower and bathtub

Soaking is one of the most important parts of bathroom cleaning, but many of us do not feel we have time to let cleaning solutions soak in and break up the dirt and grime.

For taps, a limescale remover is ideal. Leave all those areas to soak as you begin other tasks.

Read our article on how to remove limescale from toilet bowl to learn more about limescale removal.

Wipe down shower and bathtub

It is time to tackle everything that you have soaked. Unless you have heavily built up limescale or grime, you should now be able to simply wipe all of these surfaces, and they will come up looking great.

bathroom cleaning

Clean the Shower Curtain or Doors

Cleaning a shower curtain couldn’t be simpler. We are going to use our old cleaning friend here: white vinegar, which is excellent for cleaning surfaces all around the home and ideal for this application.

In a spray bottle, mix one part vinegar with four parts water, then open the shower curtain fully.

Next, spray the cleaning solution over the entire curtain, paying particular attention to the area of the curtain that hangs over the side of the bath. Ensure to completely saturate the curtain.

Leave the shower curtain to soak as you work on other cleaning tasks around the bathroom, and then rinse the shower curtain off with warm water. The shower head works a treat for this.

Cleaning shower doors is also really simple. An equal parts vinegar and dish soap mixture can be sprayed onto the door and left to soak for about 30 minutes. Rinse the shower door with warm water, and then wipe the door down to remove any excess water and cleaning products. You then use a squeegee to ensure any watermarks and soap scum are gone forever.

how to clean a bathroom

Descale the Shower Head

To deep clean shower heads and remove as much limescale as possible, we’ll be turning to vinegar again.

Grab your cleaning bucket or any plastic container you have. Pop the head into the bucket and fill it with white vinegar until the entire head is covered. Now leave the shower head to soak for at least 30 minutes. This is the perfect time to clean the bathroom floor, toilet bowl or bathroom tiles.

Once the soak is finished, just use warm water to rinse the shower head. This cleaning trick works fantastically well; you’ll be amazed!

removing limescale from shower head

Give mirrors a wipe

It is fairly simple to get a streak-free shine on a mirror. Use glass cleaner on the cloth, not the mirror and don’t apply too much. Then, in a zig-zag motion, wipe the mirror from one of the top corners to the bottom. You can use the same method for the bathroom windows as well.

If the microfibre cloth is too wet, it will leave some streaks, so flip the cloth over and carry on wiping. That is it; you will have streak-free mirrors that will be the focal point of your bathroom.

wiping bathroom mirror

Clean Bathroom Countertops, Walls, and Ceiling

Cleaning the walls and ceiling of your bathroom can be as simple as grabbing a microfiber cloth to remove dust or cobwebs. If you notice any stains on the walls or ceiling, these can be taken care of with a clean cloth and a cup of vinegar mixed with a bucket of water. With a damp cloth, lightly go over the area in circular motions, and the problem will quickly disappear.

This is also a great time to clean any light fixtures around the bathroom. To clean your bathroom lights, a microfibre cloth is ideal. It will pick up most dust and dirt on the light, and unless there are any stains on the lights, this is all you have to do.

For bathroom countertops, the same methods apply. A microfibre cloth can be used to get rid of any dust, for example. However, if you come across any soap scum or toothpaste, for example, you can use a mixture of vinegar, baking soda and water to remove all of this. A clean cloth with a bit of the mixture on makes light work of anything on your bathroom or other surfaces too.

Clean the Bathroom Sink

To clean your bathroom sink, fill it with a few inches of hot water and add a couple of cups of white vinegar. From there, grab your rubber gloves and a soft cloth and scrub the entire sink. An old toothbrush can also be used to get into tighter areas. You can also use the mixture on your sink taps and the countertop.

If you have any lingering limescale or toothpaste stains in the sink, you can leave the cleaning solution to soak for a while. Then, simply drain the sink and leave it to dry. It is a good idea to use a disinfectant spray after this; it ensures all germs and bacteria are taken care of.

bathroom sink

Clean the toilet bowl

A deep clean of the bathroom wouldn’t be complete without tackling the toilet bowl. While any bathroom bleach product will take care of the bowl, we prefer to use a mixture of bicarbonate of soda and vinegar for this.

Two cups of vinegar and a few tablespoons of baking soda are all you need. Give the mixture a swish around with your toilet brush, and leave it to soak for about 15 minutes. If you have any brown stains in the toilet, leave the solution to soak for longer, moving it around every so often.

This gives you time to clean the toilet seat and remove any loose dirt and stains.

Once the soaking time is complete, it’s time to pull out the toilet brush again and give the whole bowl a good going over. Once it looks good, flush the loo, and it’s time to move on to the next job.

How to clean grout

Cleaning grout takes a bit of time, but it is well worth it once you see the results. Start with our old friend’s vinegar and bicarb and create a paste. You can also use hydrogen peroxide and bicarb if your grout is heavily stained.

Coat all of the grout in the mixture. You can use an old toothbrush for this. Leave it to soak in for about 10 minutes, and then use a strong-bristled brush to scrub the grout. Once finished, use warm water to remove the mixture and then leave to dry.

For any really stubborn areas, you can use a grout brush or pen to hide these areas.

how to clean tile grout

Wash Hand Towels

One of the best places to start when cleaning your bathroom is to remove the hand towels and bath mats and give them all a wash. The top tip for cleaning hand towels and bath mat is to simply follow the instructions on the label, and if you do this first, they will be ready to use when the bathroom is nice and clean.

How to clean a bathroom floor

Once your bathroom looks amazing, it is time to finish it off by sweeping or vacuuming and mopping the bathroom floor. Leaving the floor of the bathroom until the end of your cleaning session means that dust or grime from the rest of the bathroom will not get on the floor after it is clean.

And you’re finished! By following these bathroom cleaning tips, you can make light work of cleaning your bathroom and actually enjoy cleaning it too. However, if you would like Cleaning Express to clean your bathroom instead, give us a call or message us on Facebook.

Our professional cleaners are just a message away, we can provide deep cleaning or regular domestic cleaning services. Alternatively, we have every other cleaning service that you could ever need, and we can truly take the stress out of cleaning by cleaning your entire house for you!

You can also read: Domestic cleaning – tips on how to clean a kitchen

FAQ

How often should a bathroom be cleaned?

Ideally, a bathroom should be cleaned once a week, although the toilet bowl can benefit from more regular cleaning than this. A deep clean, like the one we’ve shown above, should be done every three months.

Best way to clean a bathroom

Start with any cleaning tasks with a longer soaking time, and then do the quicker tasks while you wait. Dusting the walls and ceiling is a good place to start while you wait for things to soak. This maximises your time and ensures you are cleaning efficiently.

What should you not do when cleaning a bathroom

You should never use any abrasive cleaning products on tiles or ceramics. And be careful of watermarks. Investing in a squeegee will make watermarks a thing of the past. You should also never wipe surfaces right after you spray them with the cleaning solution. Give everything plenty of time to soak; your bathroom will be much cleaner if you do.

What do professionals use to clean a bathroom?

A professional bathroom cleaner uses the exact same cleaning products as you do. In fact, many cleaners love to use white vinegar and bicarb and very rarely reach for a harsh chemical cleaning product unless the bathroom is in really bad shape.

Professional cleaners use their time wisely, though. Taking advantage of soaking time by working on other areas of the bathroom or by cleaning other rooms of the home. So, if there is a difference, it would be maximising the cleaning time they have rather than the cleaning solutions being used.

Well, it’s time to tackle the kitchen! If you struggle to keep your kitchen clean and are wondering how the professionals do it, this cleaning article can help. Below, we have some brilliant domestic cleaning tips on how to clean a kitchen and additional tricks from our professional cleaners that they use in our customer’s homes.

tips for cleaning kitchen

Kitchen cleaning tips that will make your life easier

Keep a checklist

Keeping a checklist is one of the easiest ways of staying on top of cleaning tasks. We would recommend a cleaning checklist for your entire house, but it can be broken down into individual rooms to help you stay on track too. Include all of the cleaning tasks that you don’t do regularly (the ones that we often forget about)—things like cleaning the fridge, oven and tiles. And also, include a schedule of when you need to clean them. That way, you can keep track of your cleaning tasks and put a satisfying tick next to all of the cleaning tasks you complete.

Soak as you go

If you’re going to clean your oven, it is a good idea to start soaking everything before you tackle other kitchen cleaning tasks. So, soak the racks in the sink and apply the oven cleaner to your oven. That way, once the smaller tasks are complete, the oven and the racks will be much easier to clean. This also works with any cookware that has burnt-on food, coffee makers and loads of other cleaning tasks that usually take a lot of time!

Collect rubbish and random objects

Before you begin washing the floors or countertops, collect all rubbish and throw it away. Also, collect any random objects that the kids have left in the kitchen and pop them in the laundry basket. They will be out of the way as you clean the kitchen, and you’ll remember to pop them away when everything is done.

Wash cabinets and shelves

Washing cabinets is very simple. Warm soapy water, a microfibre cloth and some elbow grease are all you need to bring your cabinet fronts back to life. While you’re doing the front of the cabinets, dust the shelves with a slightly damp microfibre cloth too. This cleaning task really doesn’t take that long but makes such a difference to the look of your kitchen.

house cleaner near me

Sweep and mop your floors last

The perfect time to sweep and mop your kitchen floor is once you have finished dusting and cleaning every part of your kitchen. This means that any dust from the shelves or food particles from the oven will be swept and mopped away. It also saves you time. If you start by mopping your kitchen floor, chances are, you will have to repeat the process once all other kitchen tasks are completed.

If you wish to hire professional cleaners to come and clean your house for you, then here at Cleaning Express we are always happy to get this arranged. We provide deep cleaning services with particular attention to all areas within your home, every corner and every appliance. Once your house is professionally deep cleaned it is much easier to maintain thereafter. Cleaning Express provides regular domestic cleaning services for those who wish to receive consistent and reliable cleaning service on a daily, weekly or fortnightly basis.

We hope these kitchen cleaning tips will help you clean your kitchen. For even more cleaning tips, check out the rest of the Cleaning Express blog. Or if you’d like Cleaning Express to handle the cleaning of your kitchen and every other room in your home, please get in touch by calling  0203 633 0390 or message us on Facebook. Cleaning Express can provide every cleaning service you could need to keep your home clean, tidy and safe for your family.

You can also read: House cleaning tips on how to clean the bathroom